Search

Translate

Showing posts with label Simple. Show all posts

Friday, 2 August 2013

Outdoor Vintage Signs! Give it a try?

Hello everyone!
Well the time has come for everyone to start enjoying their summer for real! Stress and Care free!

I once did an article called "That Cute Little Touch"  , Well now it is time for that Outdoor cherry on the top!

You can get so many different types of signs all with cute messages, nouns or sayings on! You can personalize them to.
Like this one...
Haha, what a classic thing to say!


How cute is this , use stencils to create that gorgeous touch!


Want to make some gorgeous signs yourself?
Why not give it a go?
Heres what you need to do..

What you will need...
~You can make or buy these , here is a preference to buy 
 This letter stencil is elegant and sweet and you can use them more than once too!

~You simply need a bit of wood, doesn't need to be completely smooth either, a little rough will make it that extra bit authentic. ~Here is an example~
This is simply the perfect texture!
~Some paint to paint it over with, can just be rough , care doesn't matter as much for the shabby chic look! ~For Example, Click here~

~You may want another stencil of a rose or something , as an extra little touch! Or maybe make one like this! 

~String or Ribbon! Just something to hold the sign up! Unless you are nailing it to a door or wall.

What do you do?
Well this is as simple as 1,2,3,4
1.Paint the piece of wood with your chosen colour and leave to dry!
2.Carefully paint on the lettering using the stencils
3.Add on any extra little Touches , For example: The Rose!
4. Add the string/Nail it to the wall or door!
And their you have it soo simple to do! Great for a rainy day! 

Well their you have it, I hope everyone is having a great summer so far! 
Much Love to you all, Keep looking for any picture updates :) Much Love to all, Buttercup x

Pictures are from Google. We have no ownership or copyright over these letters. All copyright belongs to Google.com and the original owners.

Thursday, 18 July 2013

Taking interior Out Doors x


Hello Guys, Today i am blogging once again, a proper interior blog this time, it has been so long! Hope you are all having great summers too! Today i am going to show you my favorite top 10 shabby chic vintage outdoor photos!


Number 10 ...
10:I love how the colour all co-ordinates , what a lovely meal you could have here! Just sets the scene perfectly!

8: Love this , feels so refreshing and really brings
out spring and freedom!
Number 9 and 8!
9:Again, how cute is this? LOVE the bird cage so much!

Number 7 and 6!


7: Sorry this is a little blury , but it is lovely
and just proves that those little vintage touches
are all worth while!

6:This is a cute ,relaxing lay out with neutral
colours blending in with the
gorgeous floral pattern!


Now for the TOP 5!!
5: This is soo cute with all the florals and gorgeous
patterns!! Love it!


 4: Love this soo much! Note the lace pattern on the hammock! 

3: This is soo cute! Just that totally gorgeous garden all round style!
 
2: soo cute , Love the Shabby Chic furnishing Pieces!

And Last but by no means least .. NUMBER 1!!

I simply LOVE it just ... wow .. i couldn't have done anything better myself... It us just soo cute and rustic!!
WOW!


Well, I hope you liked it, thank you soo much for reading!! Don't forget to follow us on facebook and twitter and message us telling us all about your plans for the summer holidays! Hope your gardens look as great as these ones.. wish mine did!! Lots of love to you all, thank you for all your support so far! PLEASE share this blog because we have almost reached our target for the end of the year (view wise) and would be great to finish it as early as we can, feel like such an achievement! Much Love to you all, Thank you again for reading, Buttercup :) x


ctures are from Google. We have no ownership or copyright over these letters. All copyright belongs to Google.com and the original owners.


Wednesday, 10 July 2013

5 minute Summer Hairstyles

Hair has never been so simple to style with these Simple Summer Hairstyle. Wonderful for the beach,festival or night out!
( Or just for lounging about
at home. We won't tell!)

All modelled by my wonderful friend @Rikykaiu33 from Youtube. So check out her channel!

1.Straight sleek ponytail


Start off by putting your hair into just a regular ponytail about 10 centimeters above the back of your head and tie it with a hairband. Then take your straighteners and straighten small sections of the ponytail until it is straight, pin back any bangs with a bobby pin that matches your hair colour and your done!

Top tips!
~Straighten in sections for a more straight look
~ Use hairspray on fly-aways!

2. Fishtail plait
Brush all of your hair so it is resting on your back and separate into two even sections, it is quite important they are equal.
 Get both sections in either hand and rest one section on the fingers of the opposing hand. Take a small clump of hair from the outer site of the section and cross it over the section you got it from and underneath the other, doing the same for the other side. 

Repeat this process until you have reached the bottom of your hair, if you have layered hair this may be a bit more difficult. 


The smaller the sections the better the effect, but this is up to you! Tie the end with a clear or colored hairband similar to your hair colour and you're finished.


Top Tips!
~ Style up your fish-tail plait by incorporating a ribbon or bow!~ So cute!
~ Experiment with lengths, and also which side you want the fishtail plait to be on!


3. Volumed Quiff

Brush the front section of your hair back (including bangs if you have them) and get some bobby pins. Pull it back so the hair is flat and push it up slightly before pinning it. 

That's all there is to it! Hairspray if needed.


Top Tip!
~  putting hairspray on your finger then smoothing your hair to tame all of those annoying flyaway hairs really helps!
~ For more volume, use a voluminous spray or back-comb.
~ Use a salt spray to create wavy curls, that go perfect with this look!

4. Top Knot 
Simple for any occasions, and always chic!

Tie your hair into a high pony tail and take a small or medium sized donut (depending on your hair length) and place it over the ponytail, so your hair is in the middle of the donut. Wrap your hair around the outside of the donut and bobby pin it into place. 


The Original inspirations


Hope you Enjoyed this article! Thankyou for reading. Comment your favorites, and follow us on twitter @VCountryRose.

Lots of Love,
CountryRose x


Pictures are from Google. We have no ownership or copyright over these letters. All copyright belongs to Google.com and the original owners.

Sunday, 26 May 2013

Homemade Makeup Ideas

Easy Home-made Makeup Ideas
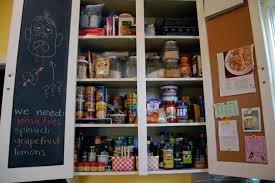
Many Of these Items can be found in your cupboards!


I love buying new makeup, but I find it the best brands can be Expensive. Being an avid lover of anything Sustainable, I decided to try and make my own things. 

Here are some of my favorites, all tested by me. You may have to perfect the recipes yourself, so that they suit your skin tone and preferences. 

Feel free to leave suggestions in the comments below. 


Cleanser 

Ingredients                                                                   
~ 2-3 Tablespoons of Honey
~  100ml Filtered Water * Approximately
~  2 squirts of Liquid Soap, ( Or you can melt a cube of Soap for 30 seconds in the Microwave)
~ 1 Empty Container, preferably a Pump Bottle


Method :- 
1. Spoon out your honey into your container. If the honey is not soft enough, microwave till runny. 
2. Filter your Water ( You can always use normal tap water, but I prefer to make sure its free of any Impurities.) by putting it through a filter.
3. Pour this Water into your Container
4. Add in your Liquid Soap.
5. Mix all of these well, until they produce a thin, watery like texture. Shake before using.

This mixture will keep for approximately two weeks, after that you can make a new one. 


Top Tips
~ Experiment with different colours and smells. 
~ Tea tree oil and Rosemary are two products you could add in, to give your skin an extra special treat. 
~  Why not use up whats left of a Foaming Facial wash, to make it a Foaming Cleanser!


Gentle Face Scrub
A face scrub is a must in any Beauty Routine. Removes dead skin cells and unclogs your pores. This Face-scrub tutorial is very gentle on the face, whilst doing its job. I find that Shop ones are very rough.

Although this method is longer, and takes perfecting to suit you, it leaves your skin super soft!

Ingredients
~ 1 Chamomile herbal tea bag
~ 1 Forest Fruit herbal tea bag
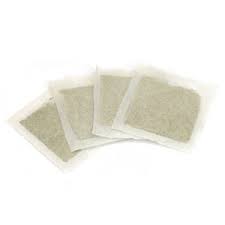
~ 1 Mortar and Pestle 
~ 2 Tablespoons of Sugar
~ 1 Tablespoon of Semi-melting honey.


Method :- 
1. Brew yourself two cups of herbal tea, one of Chamomile and the other of Forest Fruit.
2. Take out the tea bags, and place them in the Mortar ( Or a bowl)
3. Wait for the tea bags to cool down, then carefully rip them open.
4. Pour their content into the Mortar and gently crush. Do not crush them into a powder, just crush until they are rough but not harsh to the touch.
5. Melt your honey for approximately twenty seconds or until soft.
6. Mix together until thick but runny. 
7. Add in your sugar, carefully mixing it in as you go. 
8. If you think your mixture is too thick, add in a little water. If you think your mixture is not thick enough, add in more Sugar and Honey. 

Store in the fridge for about 30 minutes. This will let it cool and set. To use the Scrub ; Wet your face, and apply it ( Ignoring areas such as your eyes and mouth). Massage it onto your face in circular motions. You should feel it gently scrubbing away at your pores. Rinse off with water. 


Top Tips! 
~ Use different types of Herbal tea
~ Mix with a small amount of your favorite Face Mask, turn it into an Exfoliating Mask!


Mascara
We all use Mascara, so why not try and make your own. Whether its to use regularly or if you have run out and need a quick fix. This recipe is super easy and quick too!


Ingredients 
~ Vaseline or a thick Lip balm            
~ 1 old tub or Mascara tube.
~ 1 Mascara wand
~ 1 old Eye-shadow
~ 1 Teaspoon of Water


Method :- 
1. Take your Eye-shadow, and gently crush it. I find it easiest to crush it with a normal table knife, as I find it can get into the corners of the eye-shadow container easiest.
2. Take your Vaseline and spoon it into your Container.
3. Pour in your now crushes Eye-shadow
4. Mix well for five minutes
5. I found that the mixture was way too thick, so I added in one tea spoon of Water. You may find that this water seems to just "Sit" on top of the Mixture, but I assure you it does gently wet the formula. Therefor making it easier to apply. 

After you have dipped your Mascara want into the mixture, I strongly reccomend removing any clumps that you see on it before applying it. Im not yet sure how to improve the recipe and make it less clumpy. If you have any ideas please leave them in the comments!


BB Cream
BB cream is just perfect this time of year. Light on your skin, but still gives you enough coverage! This Recipe is more trial and error, as you have to find the right balance that fits you. 

Ingredients
~ 1/3 of your Foundation
~ 1/3 of your Favorite moisturizer 
~ 5-7 sprays of Sun-cream, or two or three squirts.


 Method :- 
1. Mix together your Foundation, Moisturizer and Sunscreen together.
2. Carry on mixing, and test it on your cheeks. 
3. Trial and error till you find just the right combination for you.
4. ** Optional **  add in a teaspoon of your favorite smelling cream. 


Tinted Lip balm
A tinted lip-balm applies just a hint of colour to your lips, whilst giving them just the amount of moisture that is needed. Here is how to make one, and its really simple!

I sometimes find I can't find a colour that suits me, with this easy was you can whip one up whenever you want! And have the shade perfect for the event!

Vermilion Red!

Ingredients
~ A few lipsticks or Blushes of your choice
~ Vaseline
~ A small tub
~ A plate

Method :-
1. Scoop 2-3 Teaspoons of Vaseline into your Tub
2. If you are using a powder blush, then  remember to crush it up.
3.  Start mixing your Lipstick/Blush colours onto your plate, just like you would a paint, until you find just the right shade for you. For your first one, you might just want to start with a simple Vermilion Red.
3. Now mix in your lipstick colours gently. 
4. Put it in the fridge for around ten minutes, just to cool and harden it a little. 


Thank-you for Reading!
 "Like" us on Facebook at www.facebook.com/VintageCountryRose
Follow us on twitter @VCountryRose
Ask us a question at www.ask.fm/VintageCountryRose


For Business Reasons Email us at VintageCountryRose@gmail.com

Or message us on Facebook or Twitter. 
We can Skype or Text to Business Colleges if its more convenient 


Pictures are from Google. We have no ownership or copyright over these letters. All copyright belongs to Google.com and the original owners.

Monday, 20 May 2013

Yoga, The benefits

A pint of Ben & Jerry's ice cream
Who can resist? 
FOLLOW US ON TWITTER @VCOUNTRYROSE


Hey guys! 
This Year ( Like everyone else) decided I would try and be healthier.. and its only may and already I am scoffing tubs of Ben and Jerry's. 


But there is one form of excersize I have been able to stick with, half because of the benefits I feel and see every day, But also the calming feeling you get. What is this magnificent thing you ask? 

Yoga my friend! The benefits really are endless. 

It really is an Old art, hense the "Vintageness". 


Facts 
- Yoga helps to Enrich you not only in Body, But also Mind and Spirit. 
- It originated in Ancient India
- It helps Encourage you to fulfilling  your goals, and therefor is very Interdependent : Even if your doing it with a Friend or a Group.
- You can start whenever you want, Either at Home or at a Yoga Centre or Fitness Centre.
- It can really relax you, especially when your angry.
yoga
Yoga classes, not as awkward as you would
think.

Saturday, 12 January 2013

Easy Vintage hairstyles to try today!

Hey Guys! 
Want to learn how to make pretty Vintage hairstyles that arn't waay to difficult to achieve. I tried to pick things that you can easily personalize and would be suitable for many hair lengths and styles. Enjoy and follow us on twitter @VCountryRose 


CountryRose 

The Scarf tied up-do.
This look must be one of my favorites. Its so easy to mix up and change. 

Some tips : 
If you want a girly look , go for florals
Want a more modern look? Go for red's and blacks , and bold patterns. 

Spritz a volume boosting spray into your damp hair .Create a deep side parting ( Or experiment if you would like ) and tie your hair in a ponytail at the top of your head. Take random strands of your hair and gently tug them out of the up-do for a more messy, relaxed look.Create gentle curls with your curling iron. When the curls have cooled , and your happy with your look , you may want to rake your fingers through your hair to break them up and randomly pin the curls into a messy bun.Tie a pretty scarf around your head to complete the look. Simple and Versatile.Done!

Time Taken : 4-6 minutes ( depending on how many curls you put in your hair ) 

Side Pony-tail with a teased crown

I absolutely love this one. Your hair does have to be medium - long to work best with this look.But feel free to try it.This look is all about volume, don't be afraid to go the extra mile with it.

Some tips : 
Why not give it a tousled , beachy look.
Add a flower for extra glam

I find its easier if you turn your hair upside down and spray a generous amount of dry shampoo ( love the stuff) throughout your hair to help with volume. Then apply the dry shampoo to your crown , teasing with a comb to create lift.Smooth over the teased area a little , and place bobby pins in to keep it all up.Then tie your hair into a side ponytail behind your ear , keeping the front flat and finish with a spritz of volumizing finishing spray.

Time Taken : 6-9 minutes 


The Geometric cut 
This look can really help to define your cheekbones , but is only for the brave. This bold cut is also very easy to style. Dare for the cut! 

Use a great conditioner , to make your hair look very soft and shiny.Blow dry with a paddle-brush and them smooth a bit of anti-frizz to keep it all looking glossy and smooth. Well worth it ! 


Time Taken: 3-5 minutes

High Ponytail bound twice 

This one helps you look glamorous , but is also practical. A top tip is to keep it the main focus, by wearing minimalistic makeup .

Brush your hair and pull it up into a high ponytail.Smooth hair with a touch of gel , and secure with a hairband of your choice ( but preferably a plain coloured one that matches your hair colour , so that it is not too noticeable . Brush out the ponytail and add another hair band two inches down , and brush out your ponytail again. Finish by rubbing a dab of cream into the palms of your hands , and smooth it over your ponytail for added shine.

Time Taken : 5 minutes


Soft wave bob with a low side parting.
Ok now this one is really simple, but will look beautiful and romantic. Again , it would be best if you wore simple make-up.This one is best for people with shorter hair , but don't let it put you off giving this look a go.
Spray each 1-inch section of your hair with two to three spritz's of hairspray and put it into a hair roller. When the rollers feel cool , let your hair down. Spray some dry shampoo at the crown of your head , let it dry of course , then brush your hair out , gently as to not remove any of the curls! And shape with your fingers , finished.

Time Taken : 10 minutes

Long Curls! ( Or short curls )

This look , i would happily wear everyday if I could. Glamorous, feminine and perfect.It takes a little longer to achieve naturally , and will have to be taken care with to ensure it looks its best.

Top tips : 

Use dry shampoo when curling , it makes hair more manageable. 

Wash your hair with a volumous shampoo.And either let your hair dry naturally , or dry it with a hair dryer with a large round brush.Curl your hair with hot rollers, or if you would like: a curling wand. Spritz on some volumising spray to create texture.Finish with a touch of hairspray , to hold your look in place.


Time Taken: 20-30 minutes ( Takes a little longer than the rest , but i assure you its worth it) 


Teased double bun
I absolutely ADORE this one.Simply to achieve , but stunning to look at! Beautiful , elegant and romantic.The key is to try not to make your hair look perfect , but to let it fall naturally.

Top tip : 

Why not make it edgy with strong metallic makeup? 

Split your hair into two sections , creating a parting in the middle of your head , from one ear to the other.Clip the top section out of the way, then take the lower half and do whatever you  would prefer to use , to make your hair more volumous. ( Volume spray, teasing with a combe, etc) Then wrap the lower sections of your hair into a loose bun, using pins to keep the ends in place.Then take the top section of your hair , and spray generously with hairspray, before backcombing your roots , to give you the modern "Beehive" affect.Secure the pouf with bobby pins , before tying the top section into a ponytail.On the last turn of your hairband, don't pull the ends of your hair through.Lastly, gently tug the looped pony, so that it hangs over the lower bun.

Beautiful 

Time taken: 20 minutes , if like me you are a perfectionist and want to make sure everything looks right.


Rolled Back-updo

This is one look that I hardly ever see people wear.Which is such a shame.Beautiful and iconic to the vintage times , the rolled back-updo puts all the emphasis on your face.So I reccomend a bright lipstick and minimal eye-makeup.

Lightly spray texturising spray onto  your hair to make it light , and easy to grip.Blow dry it back for texture.Part it in the middle.Twist one side back and pin it in place at the nape of your neck : and repeat on the opposite side.Then connect the ends and twist them back into a soft bun.Finish with a very light touch of hairspray.


Time taken:  5-8 minutes

And lastly , 
My favorite , 

Finger Waves!

The finger waves , traditionally worn by the likes of Marilyn Monroe.Flirty and beautiful. More easily accomplished with short - medium hair length.
Marilyn Monroe
Marilyn Monroe

Start with dry hair. Work in 1-2 inch sections, lightly spray each section with a texturizing mist , and wind into it with hot rollers. Or a curling iron ( This will take longer).When the rollers are cool, sculpt the curls with your fingertips , and finish with a spritz of hairspray for hold.

Time Taken : 10-13 minutes.


Thankyou very much for reading.Feel free to try any of these hair styles , and your more than welcome to comment in the box below! Tell us how your hair styling experience went.And your welcome to send us pictures on our facebook page of your hair!


Some times have been  approximated but will differ depending on hair length, thickness and condition. Care in handling hot equiptment.If you are under 12 we urge you to have a parents permission to use hot hair equiptment.Copyright of VintageCountryRose Co.Marilyn Monroe photo credit Sasha065


Pictures are from Google. We have no ownership or copyright over these letters. All copyright belongs to Google.com and the original owners.
Enhanced by Zemanta